One of our family traditions is to celebrate birthdays and special occasions at Chuck E. Cheese. I love how all the rides and games are only one token, how I can always get coupons from the Sunday paper, and how arriving at 9am guarantees a peaceful and empty establishment for at least an hour or two.
I realize that I also love the little sketch machine that they have.
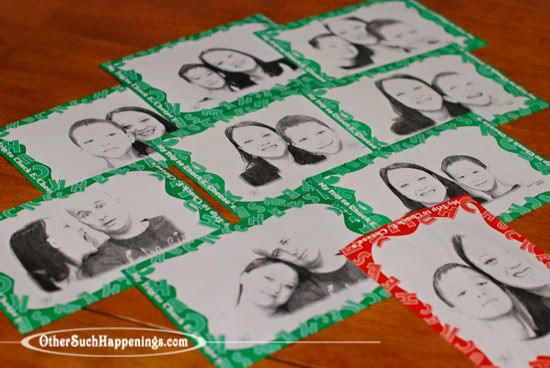
Maybe we love it a little too much?
My dilemma is this: What to do with all of these pictures?
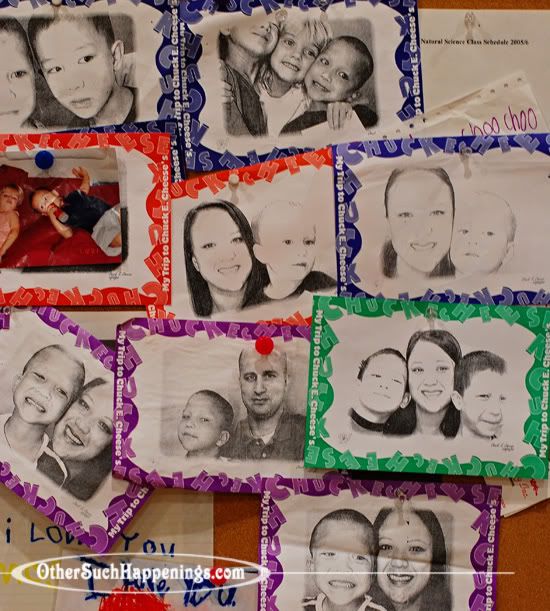
I am thankful that all the pics have the date written in the corner and are printed on regular paper (rather than the paper that is heat sensitive). Just the ones pictured total 20. I am pretty sure I have some more stashed around here somewhere. I would like to do more than just throw them in an album.
Any suggestions on how to display these without looking tacky or taking up an entire wall?
Does your family have a special celebration place or tradition?
(PS Please please link your email addy to your blogger account so I can reply directly to your comment via email. I love having a conversation with my friends!)
23 comments:
Sorry, my creative gene got sucked out by aliens when I became a mom. I got nothing. :(
No suggestions on what to do with all the pictures, but I just had to stop by and let you know that you're not alone in your love of that little machine. The pictures are so cute! One of my all-time favorite pictures of the kids is one my oldest talked the other two into making with that machine.
How about a big collage? Get a stretched canvas on wood like at Hobby Lobby or something and use Mod Podge to make it into a collage. You could actually paint the canvas first for a background color if you didn't want to keep it white.
My first thought was a collage. Arrange them even just within some sort of large frame using photo safe glue. You could even make a little table somehow with a glass/plastic top over the pictures in a collage format.
Thats all I can really think of.
I just stick them in an album. Nothing creative coming from me. Scrapbook them? *shrugs*
let me think on it. i think having all these is neat (but a bit weird). i know there is a neat way to display them you just need to find the right person who can tell you. ruthanne has good ideas.
I'm thinking some sort of collage with mod podge. But I don't know what you would put it on.
Hey! Where's the one of us together? :P I love you! No ideas. I was going to say wallpaper one wall with it. I guess that's a NO!
Here's my thought on the pictures. At most craft shops you can find wooden boxes with lids like these http://www.dickblick.com/products/wooden-box-with-lid/
only I would use one a little bigger than the ones in the picture.
You could paint it and then decoupage the pictures on the outside of all four sides of the box (and even the lid)....and you can even store other mementos inside the box. It would be a neat conversation piece.
I LOVE crafting! I also love Chuck E. Cheese. We used to take the kids about once a month (a little overboard). It was our Winter "Boredom Buster". We haven't been there in almost 4 years! Yikes! I think it's time for a visit.
I like the idea of a photo quilt wall hanging. I don't know if you sew, or if you know someone who does (I love sewing! but sadly am too far from you :( )that could do it for you. Here's the article - http://familycrafts.about.com/od/quiltingforbeginners/ss/Family_Reunion_Photo_Quilt.htm. But anyways you have to scan then print these pictures on fabric sheets. From there decide what you want it to look like and start sewing. Then the other pictures I would still preserve in a photo album because it is always nice to look at the originals. This way though you'd have them displayed year round without all the photo ickiness that comes with millions of pics flapping around LOL I draw quite a picture huh? ;)
Here's my idea: make the wooden box that Angie suggested with them. You could use it for a keepsake or tabletop box most of the time, but you could use it to "wrap" gifts for family birthdays. No more wrapping paper!
Tons of ideas!
If you want to preserve the originals, scan them (or photocopy or take digital photos), then print the copies out on stiff card stock or printer fabric (available at joanns.com). Using a sewing machine (or hand sewing, if you don't own a machine), stitch decorative patterns around the edges and in the background. Attach little embellishments, such as hearts, flowers, stickers, pieces of ribbons, yarn, beads, glitter, whatever, to each photo, or use some watered-down fabric paint (if you used printer fabric) to give the photos a color wash. Fabric will need to be stiffened, so you will likely want to apply some fusible interfacing to the back before embellishment. And when you're done embellishing, you may wish to satin-stitch the edges for a nice finish.
Once you have the photos decorated, there are several more things you can do with them. You can decoupage them to a board or box, as others suggested, or create a wall-hanging.
Using ribbons (or yarns, or any fancy piece of trim you like, including strung beads) to connect the pictures, punch little holes in the corners of the pictures (except the ones you plan to use on the bottom - they should only have holes at the top, unless you want to dangle some ribbons from the bottom), then thread the ribbon through the holes, being careful to line up each picture straight. Or you might prefer to use small eyelets or grommets to ensure the holes don't rip out later. Use a dowel or even a dry branch/twig as the top support for the piece. If you use fancy ribbons and trims, you might mix-match them. Let the ends dangle down the sides of the pictures. Set them up in rows and columns, or hang them at odd intervals, as you like. You can string beads on the ribbons for extra dazzle (and it would also add some weight to the piece, so it hangs properly).
(To be continued...)
(Continued...)
If you're more of an "album" type, you can do something similar in an album form. Take the decorated photos and punch small holes in each corner as above. If you used fabric, you'll want to stiffen each image, either with fusible interfacing, or by gluing on some cardstock (which you can also decorate, if you like) - apply to the back of the image. (punch the holes *after* you stiffen the back of fabric) Again, using small bits of fancy ribbons, or trim (or hemp cord, if you prefer), lay out each picture, then attach side-by-side with the ribbons, tying loosely to allow for folding/opening the book. Be careful to NOT punch holes in the left side of the first page, and the right side of the last page. If you do, not a problem, just string some ribbons through the extra holes and let the ends dangle as decoration (nobody will know you made a *mistake* and everyone will think you made a "design choice"). You can also thread some beads onto the dangly ribbons for added weight and presence. Again, you can use eyelets or grommets for the holes. Also, add a bit of ribbon to the right side of the cover to tie the book shut.
Also, if you want to preserve the photos as above, you can print copies onto photo fabric, then make a small photo quilt (which you can also embellish to your heart's content). I'm not sure how large the photos are, as I've never been to a Chuck E Cheese (yes, I have kids, but there isn't one near us).
If you want to use the original photos, many of the above ideas will still apply, but your embellishment considerations will have to take into account the weight of the paper, and whether or not you can use liquids to decorate it (such as paint, ink, marker, etc). I'm thinking that, in this case, the best idea would be the "album" treatment described above (although the wall-hanging would still work). Use stickers, glue on punched designs or die-cuts, beads, sequins, sparkles, write funny sayings with glitter pens or metallic pens, and don't forget to decorate the backs!!! If you like, you can add front and/or back panels to the album. Oh, and you'd want to "accordion fold" the album, so it could be stretched out in a long line of photos. If you prefer, just punch the left side of the photos, and make it regular "book" style (again, don't forget to decorate the backs!). Chip board might make a nice cover (with one of the photos on the cover), but be sure to fancy it up, too.
Hope some of these ideas are helpful to you. Feel free to ask if something is not clear.
You don't need anymore advice!
I hate Chuck E Cheese.
But I love you.
I think those photos are great though and worthy to be preserved.
Most of the suggestions sounded too time consuming and too difficult, if you aren't an advanced crafter. But I think I like paying money to have someone turn them into a colorful quilt wall hanging. That's my favorite idea.
And you know my email, in case you want to reply.
One more thing...
For creative embellishment ideas, you might want to check out this link:
http://www.arttradermag.com/
Lots of "Artist Trading Cards" ideas in the gallery (I'd never heard of them before last weekend) that might spark some creativity in you! :)
I didn't read all the comments so someone might have said this, but what about a bulletin board and push pins? That would be simple and fun and could hang in your game room or something. I love that you save them. I am such a terrible mother. I usually throw those out... Darn it!
I thought of something else in case you want something super easy.
My Grandma has one of these on her coffee table. She rotates the pictures in it. The kids have a blast spinning through the pictures.
http://cgi.ebay.com/ferris-wheel-multi-photo-frame-Never-removed-box-/380249927798?cmd=ViewItem&pt=Photo_Frames_Display&hash=item5888a97076
or....
A digital photo frame. Scan all the pictures onto a memory card and have a slide show. :)
Dear Marsha, I like Leslie's idea about a photo quilt and it wouldn't use the original photos, but you'd be able to enjoy it some. Not as much as we people of the north where it gets snowy cold - bone chilling, but still. Really not a big task and you surely know a seamstress... Slicker than snot on a door knob. Try it. Dee67p@yahoo.com
oo such great ideas that I only got through half.
let us know which you pick, I toattly wanna see your project.
I know loads of people have said 'collage' but how about small collages that you can laminate to make into placemats for the family to use? You could take pieces of coloured card and arrange the pictures on it and then laminate them. They would be fun and functional too and if you get more next time you can just add to the placemat collection!
uk_usa_jenkins@dsl.pipex.com
Love all the ideas. My kids like to see themselves on the fridge as magnets-dollarstore sells magnet sheets and you could glue them and use clear mactac to protect them...then they can get rearranged based on whatever mood you have?
Post a Comment