Showing posts with label recipes. Show all posts

Wednesday, March 28, 2012

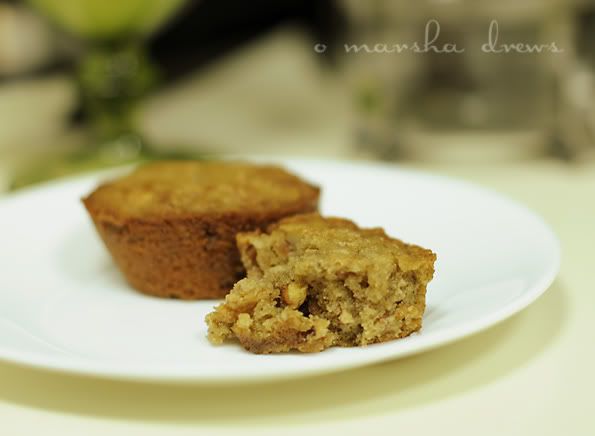
pecan pie muffins

I have been on a wee bit of a muffin binge lately and had to ground myself from making more. (Can there be such a thing as a wee binge?)

I am amazed at how 5 ingredients can create the. best. muffins. ever.

No joke, y'all. You have to make these and then tell me what you think!


PECAN PIE MUFFINS

1 cup brown sugar (light or dark, your preference)
1/2 cup flour
1 cup pecans, chopped
1/2 cup butter, melted
2 eggs

1. Preheat oven to 350 and grease/flour muffin tins.

2. Mix dry ingredients together, breaking up any brown sugar lumps.

3. Add melted butter and eggs to dry mixture, mixing well.

4. Fill muffin tin 3/4 way full and bake at 350 for approximately 20 minutes. Reduce heat and time if using dark metal pan.

5. Immediately dump muffins out and let them cool upside down. This creates a nice caramelized crunch to the outside of the muffin.

Yield: 12 muffins


{Speaking of yummy, I just want to eat this little chunky monkey up!}


Sunday, July 4, 2010

On the Grill: Teriyaki Chicken

This is a new favorite grilling recipe for me. I love anything that you can marinate* and throw on the grill. It just makes cooking easier when you have almost zero prep during the dinner rush hour. Just cook some rice and throw the chicken on the grill. Easy-peasy!


TERIYAKI CHICKEN (aka chicken teriyaki, terribly clever, huh?)

3-4 lbs boneless, skinless chicken thighs
1 c. soy sauce
2 1/2 c. water
1 c. brown sugar
1 T. chopped garlic
2 T. worchesteshire sauce
1/2 c. pineapple juice (or 8oz can whatever pineapple w/juice you have on hand)


1. Whisk marinade ingredients, making sure brown sugar is fully dissolved.
2. Add chicken to marinade.
3. Marinate* at least overnight. I prefer 24 hours for more infused flavor.
4. Set grill to medium heat and cook until internal temperature reaches 165F. (Okay, I just cook it until it looks done with no pink inside. Does it sound more pro to have the temp warning?)


*Marinade is a noun. Marinate is a verb. I never gave it much thought until I was writing this recipe down. You can read more about the distinction here if you are so inclined. (You can still learn in the summer! I know, I'm such a dork.)

I'm linking this up with Robyn at Our Homeschool Home.


Our Homeschool Home

Thursday, June 10, 2010

On the Grill: Summer Slaw

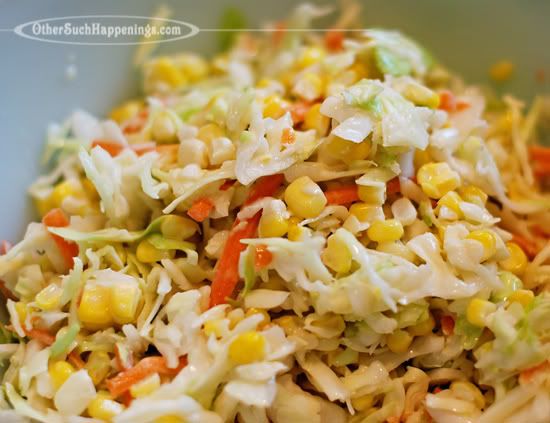
While you don't necessarily grill the slaw itself, it makes for a wonderful side dish for almost any grilled meat, be it ribs, sausage or even fish. I love the creamy dressing and the sweetness that the corn adds to the slaw.

My favorite way to eat it is in a BBQ sandwich with a little Tiger Sauce on top. Mmm....


Summer Slaw

4 large ears of corn
1 lb bag shredded cabbage mix
2/3 cup mayonnaise (or Miracle Whip *gag* if you prefer more tang)
2 T white vinegar
4 T white sugar (or sugar substitute)
salt and pepper to taste

1. Grill (or blanch) the corn. Cool and cut from cob.
2. Place cut corn and cabbage mix together in a large bowl.
3. Whisk next 3 ingredients in a small bowl until combined.
4. Add to corn/cabbage and toss well.
5. Salt/pepper to taste.
6. Cover and refrigerate for at least an hour (or overnight), stirring occasionally.


Head on over to Robyn's to see more On The Grill recipes.

Our Homeschool Home


Thursday, April 29, 2010

On the Grill: BBQ Babyback Ribs

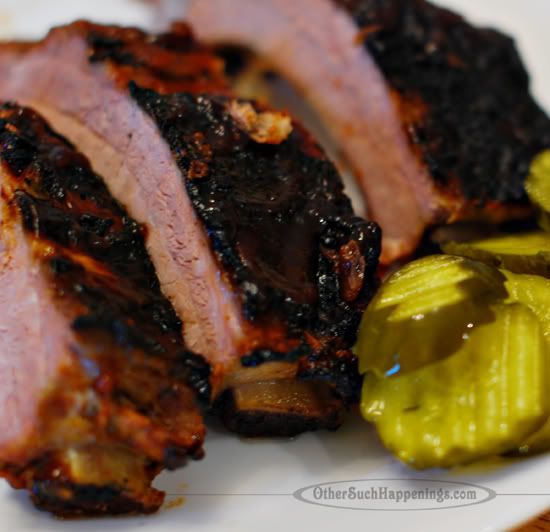
This is one of my favorite things to grill all year long. It is almost as easy as cooking in the crockpot... with much tastier results!

BBQ Babyback Ribs

Prep time: <5 minutes
Cook time: 2 hrs plus grilling time


Here's what you will need:

- 1 rack pork babyback ribs (or the more economical 3 pack from Sam's Club)
- Sweet Baby Ray's BBQ Sauce
- Foil

1. Heat oven to 300 degrees.

2. Cut the rack in half and place in a 9x13 pan lined with foil. I know that some people like to season or rub the ribs, but I find that it makes it way too salty. If you use good sauce like Sweet Baby Ray's, no extra spices are necessary.

3. Cover tightly with foil.

4. Bake for 2 hours.

Tick tock.

Play, nap, read, do whatever in the meantime!

5. Remove from oven. I'm sure I should stick some temperature guidelines here so you don't get sick from undercooked meat. But seriously, you know when it is done. The meat will almost fall off the bone when you transfer it to the grill-- so be gentle!

6. Heat grill. I also like to spray the grill with some high heat grilling oil to keep the ribs from sticking.

7. Baste ribs with sauce and place on grill. Remove when the sauce is nice and caramelized. :) I prefer mine a little scorched. YUM!

Don't forget the extra napkins!


To see other grilling recipes or to join in on the fun, visit Robyn at Our Homeschool Home.

Our Homeschool Home

Saturday, December 19, 2009

Chocolate Chip PB Cup Cookies


With only 2 ingredients, Chocolate Chip Peanut Butter Cups are a favorite treat in our house!

Hello, fellow female. I'm glad we can ignore the boys and make cookies together today. They are too busy playing video games to even notice that this recipe makes almost 3 dozen cookie cups.

Between you and me, we'll just tell them that it only makes one dozen.


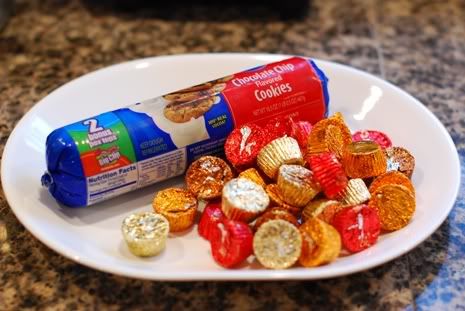
Ready to see the magical duo?


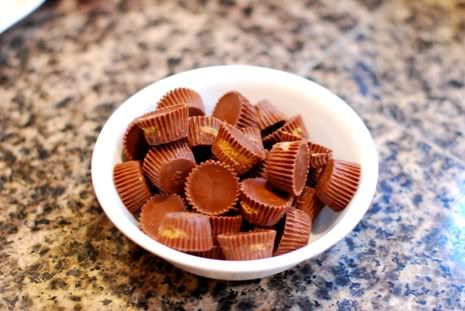
One tube chocolate chip cookie dough. One bag mini peanut butter cup candy.

(Or homemade if you have more time on your hands than I do.)

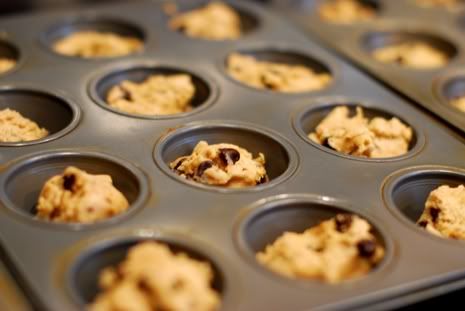
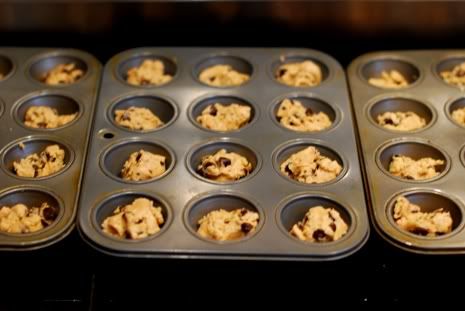
Divvy up the doughy goodness into greased mini muffin pans.


Resist the urge to eat the raw dough. It is bad for you!

Or so "they" say.

Personally, I like to live on the edge.


Bake in 350 degree oven until nice and golden. For us, that takes 11 minutes and 23 seconds.

While you are waiting on the cookies to bake, unwrap one bag of mini peanut butter cups. We throw budget out the window and go for the big dog of pb cups-- it's Reese's, baby!


If you waited until 11 minutes and 24 seconds to remove the cookies from the oven, fret not. All is not lost.

Just don't let it happen again.

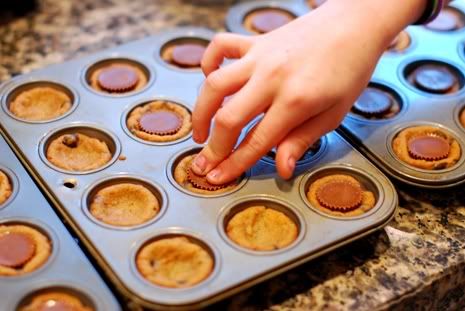
You have to listen very very closely to this part. Remove the cookies from the oven and IMMEDIATELY(!!!) push a pb cup right in the middle of the hot cookies!


(If you are doing this with your kidlets, be careful with the hot pans.)

Let the cookies cool completely before removing. Since I have waited long enough by this step, I like to throw the pans in the freezer to move things along more quickly.


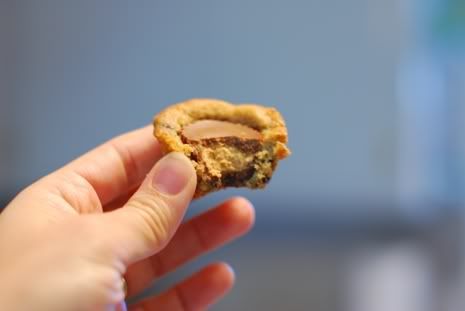
(Do you recognize this pic from Thanksgiving? When my helper and I made them this time around, we ate them all up before I realized that I didn't take a pic! No biggie. Except for my gut anyway.)


CHOCOLATE CHIP PEANUT BUTTER CUP COOKIES

11 oz bag mini peanut butter cup candy (unwrapped)
16.5 oz tube of chocolate chip cookie dough

YIELD: 33 cookie cups
  1. Preheat oven to 350 degrees.
  2. Grease the bottoms of 3 mini muffin tins (a total of 3 dozen cups).
  3. Fill each cup to 2/3 full with cookie dough.
  4. Bake for approximately 11 minutes, or until cookies are done.
  5. Remove from oven and immediately push one peanut butter cup into the center of each cookie.
  6. Cool completely before removing from pan.
  7. Eat up before everyone else figures out they are done!
Thursday, December 10, 2009

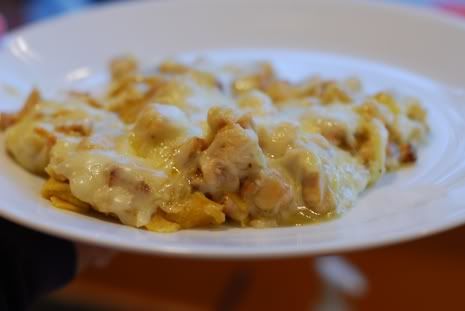
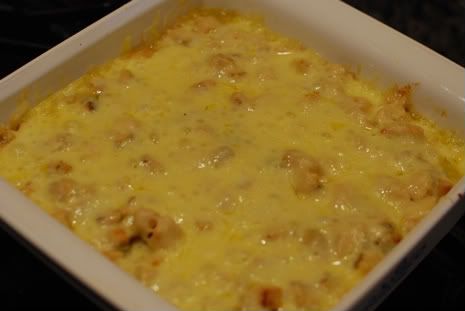
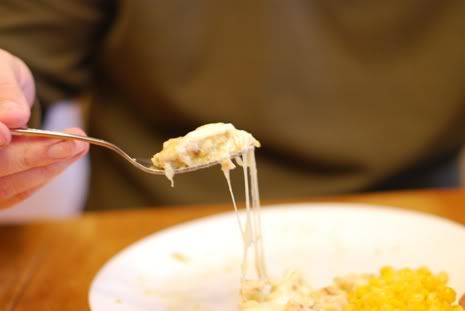
Layered Chicken Enchiladas

A cheesy family favorite, this dish uses convenience items to make dinner a snap to prepare!


It's amazing how so few ingredients, can be combined to make kid and husband friendly gooey-goodness.

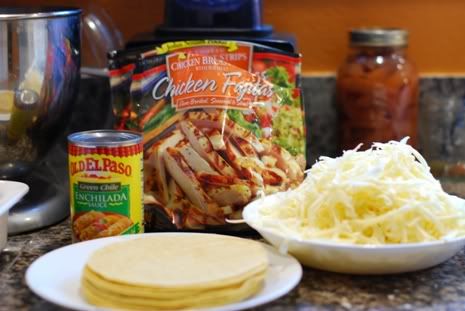
LAYERED CHEESY CHICKEN ENCHILADAS

Ingredients:
  • corn tortillas
  • 16 oz cooked, diced chicken (I like to use fajita chicken)
  • 16 oz shredded monterrey jack cheese
  • 1 - 15 oz can green chile enchilada sauce*
Yield: one 8x8 pan (or double for 9x13 pan)

1. Heat oven to 350.
2. Spray bottom of an 8x8 square baking pan with oil.
3. Layer corn tortillas, 8 oz diced chicken, 1/2 can green enchilada sauce, 8 oz shredded monterrey jack cheese.
4. Repeat layers. For variety, you can use pepperjack for one layer, although it is too dry of a cheese to use on both layers.
5. Bake uncovered for 30 minutes.
6. Serve immediately. Would be delicious served with black beans and corn salsa!


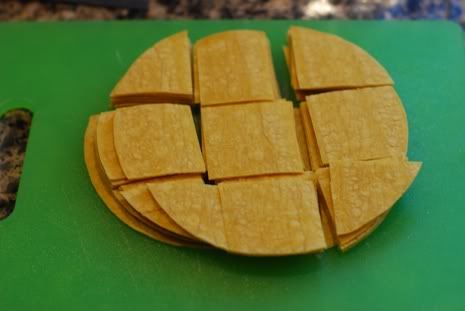
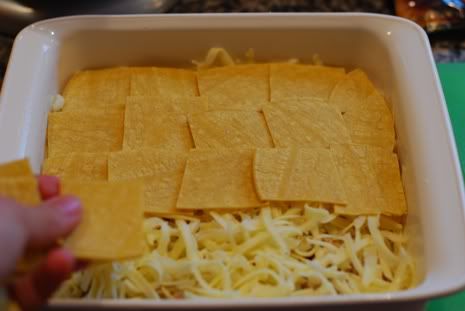
Cut the corn tortillas into squares. This makes it easier to dish out of the pan than a single round piece would be.


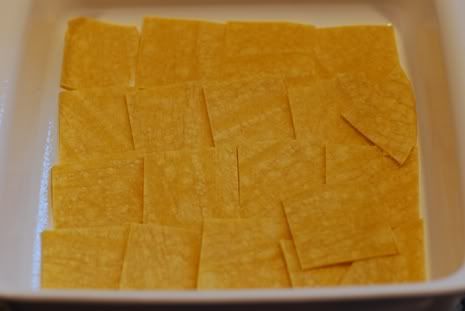
Place a single layer of the tortillas in the bottom of a greased baking dish. Look at how cozy the squares look. Since we don't want to discriminate, be sure not to waste the odd triangular-ish guys.


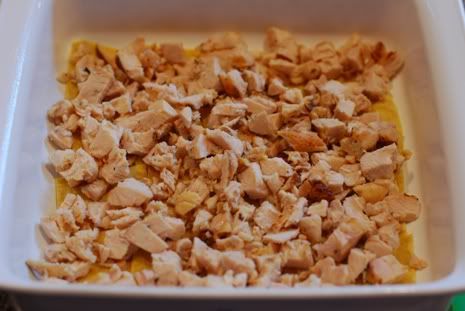
Add ze chicken. I like to use John Soul's Fajita Chicken Breast Strips.

(Anyone else have the Souuuuul Train song in their head now? Anyone else old enough to know what Soul Train is?)


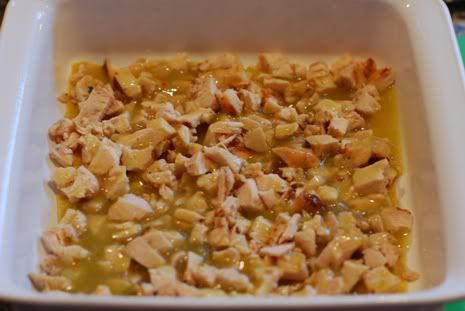
Drizzle half the can of green chile enchilada sauce evenly over the top.

*I use Old El Paso brand because it is a relatively mild green enchilada sauce. The Hispanic brands are generally spicier, so choose according to your heat preference.


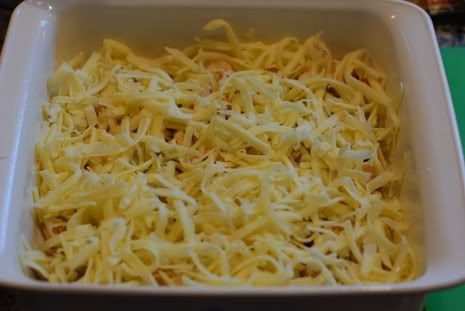
Now it's time to spread 1 cup of the shredded cheese. I like to use monterrey jack but you can do a Mexican blend or some pepper jack for a kick.


Repeat the layers of tortilla and the rest of the chicken, enchilada sauce and cheese.


You can stop here, cover and put it in the fridge to bake later if you like. Just be sure to bring it to room temp or add extra minutes to the baking time.

If you are hungry, just pop it uncovered into a 350 degree oven for 30 minutes or until bubbly and hot.

Like me.

:snort:

I kid! I kid!


Serve immediately. Ideally, you would serve it with something fresh and healthy like a salad. But since we aren't fresh or healthy at our house, we just eat it with corn.

I KNOW. We are so very bad.

I think extra jalapenos, corn salsa or even black beans would make a nice addition. This is a rather gooey dish so if you can think of something crunchy to add, feel free!


Enjoy this warm, ooey-gooey-goodness on a cold day. Or if it's summer when you finally get around to making this dish, just crank up the a/c and let me know if you like it or not.


This is one of the few dishes that tastes just as good or better reheated than it does fresh out of the oven!

Saturday, May 30, 2009

The benefits to lazy...

Sometimes a little lazy goes a long way-- at least when it comes to a fun breakfast. Because if it requires a lot of effort when it's early in the morning (okay, DO NOT look at the clock in the background!), then we will never get fancier than a bowl of cereal. :)


Wednesday, May 6, 2009

Creamy Blueberry Pie

In honor of temperatures in the 90s, I give you this yummy recipe that is neither too sweet nor too heavy. And the best thing is that this one recipe makes two pies-- so you can be neighborly and give one away, or be a happy hog and keep them both to yourself. :)


Creamy Blueberry Pie

1 (8 ounce) package cream cheese, softened
3/4 cup sugar
2 cups whipped topping
2 (9 inch) pastry shells, baked
1 (21 ounce) can blueberry pie filling

Prick your pie crusts with a fork and bake according to package directions. My favorite is Mrs. Smith's Deep Dish (although the deep dish will give you shallow pies). Let cool.

In a mixing bowl, beat the cream cheese and sugar until smooth. Fold in whipped topping. Pour mixture into pastry shells. Spread with pie filling. Refrigerate for at least 30 minutes.

Tuesday, January 27, 2009

Alfredo Sauce

I can't believe I haven't posted this recipe for Alfredo Sauce before. It's not exactly healthy, but it is delicious! I usually serve it with linguini and some diced chicken or grilled shrimp. My fam also loves it over manicotti stuffed with chicken and mozarella (bind it with one egg). This is enough sauce for 8oz of linguini or double the recipe for a 9x13 pan of manicotti. No pics this time because... well, we ate it all!

ALFREDO SAUCE
1 stick butter (1/2 cup)
  • 1/2 cup heavy cream
  • 3/4 cup shredded parmesan (I've found that the kroger brand of parmesan works as well as fancy stuff from the deli- but I'm not exaclty a parmesan expert)
  • white pepper to taste (can sub black pepper)
  • Place all in a small, heavy-bottomed saucepan. Whisk until cheese is melted and sauce is smooth. Keep a close eye on it so the bottom doesn't burn.

    Serve immediately as sauce will start to separate.

    Toss in ideas: grilled shrimp, diced chicken, fresh tomatoes

    Friday, December 12, 2008

    Cream Cheese Pound Cake

    This is my favorite pound cake recipe-- dense and delicious! It calls for being baked in a 10 inch tube pan, but I like to make mini loaves with it instead. You can also add in blueberries to the batter to make it extra yummola or slice it and eat with strawberries and whipped cream. (Christian preferred it plain with whipped cream). :-)


    CREAM CHEESE POUND CAKE

    • 1 (8 ounce) package cream cheese
    • 1 1/2 cups butter
    • 3 cups white sugar
    • 6 eggs
    • 3 cups all-purpose flour
    • 1 teaspoon vanilla

      1. Preheat oven to 325 degrees. Grease and flour (or use a spray like Pam for baking or Baker's Joy) your pan(s).

      2. In a large bowl, cream the butter and cream cheese until smooth. Gradually add sugar and beat until fluffy.

      3. Add eggs two at a time, beating well after each addition. Add the flour all at once and mix. Add vanilla.

      4. Pour into 10-inch tube pan (or mini loaf pans) and bake at 325 degrees for 1 hour and 20 minutes (less time if you are using the mini pans). Check for doneness after 1 hour with the toothpick test.

    Tuesday, October 28, 2008

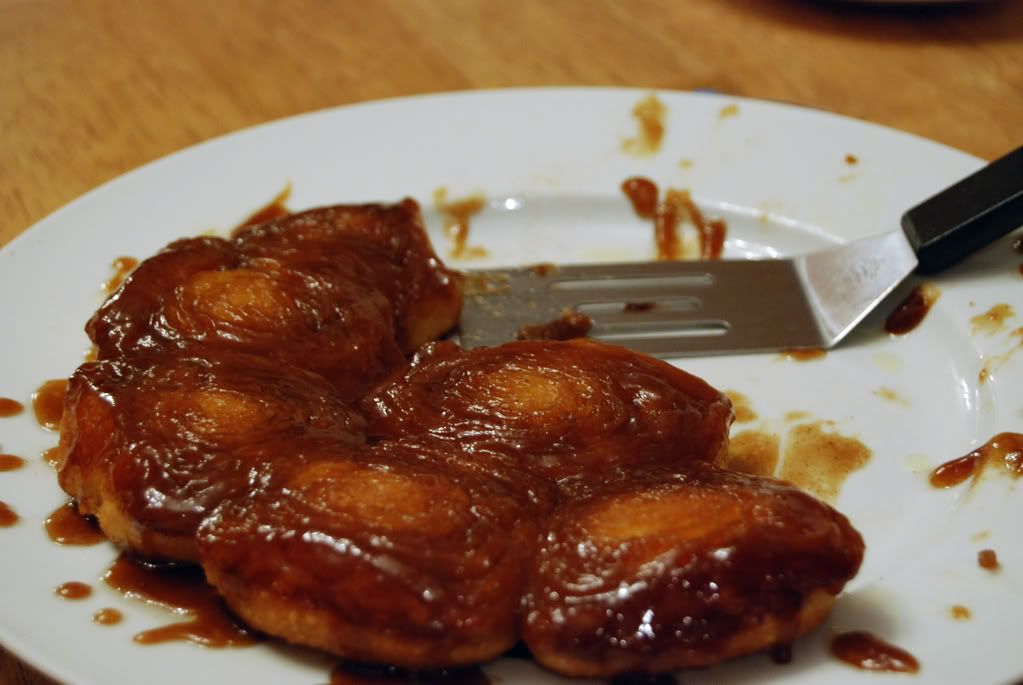
    Caramel Crescent Pull-Aparts

    Easy, gooey, delicious, warm and perfect with a cold glass of milk (or hot cup of coffee in my case)-- we had these for breakfast this morning!


    Caramel Crescent Pull-Aparts

    • 1/4 c. firmly packed brown sugar
    • 1/4 cup butter or margarine (I prefer real butter)
    • 2 Tbsp. pure maple syrup
    • 1/4 c. chopped pecans (optional)
    • 1 (8oz) refrigerated crescent rolls
    • 1 Tbsp. granulated sugar
    • 1/2 tsp. ground cinnamon

    1. Preheat oven to 375.

    2. Combine brown sugar, butter and syrup in an 8-inch round cake pan. Bake at 375 for 5 minutes until butter melts; stir gently to blend ingredients. Sprinkle pecans over butter mixture.

    3. Remove dough from package and DO NOT unroll! Slice roll into 12 slices. Combine 1 Tbsp. sugar and cinnamon. Dip both sides of each slice of dough into the sugar mixture. Arrange slices, cut side down, in prepared pan. Sprinkle any leftover sugar mixture on top.

    4. Bake at 375 for 18 minutes or until golden. Invert pan immediately onto a serving platter, and serve rolls immediately.

    Friday, July 25, 2008

    Easy Make-Ahead Chicken Burritos

    Whenever I have extra chicken on hand (and the delicious freshly made tortillas from Kroger-- mmmm...), these are pretty tasty and good on-the-go. I think when soccer season is upon us once again we will be eating a lot of burritos...

    Chicken Burritos
    • 2 cups chopped cooked chicken
    • 1 (1.25oz) package taco seasoning mix
    • 1 (16oz) can refried beans (can use whole or black beans but these are nice and sticky)
    • 8 (8-inch) flour tortillas
    • 1 (8oz) package shredded sharp cheddar cheese
    • Salsa (verde-- the green kind is good, can also use regular red)
    • Chopped plum tomatoes (about 3) and 1/2 c. minced onion if desired (my kids don't desire it, thankyouverymuch).

    -Place chicken and seasoning mix in large ziploc bag, seal and shake to coat chicken.

    -Spread beans evenly over tortillas. Top each with chicken, cheese, tomato and onion; roll up. Wrap each burrito in foil; place in 5-6 quart slow cooker.

    -Cover and cook on HIGH for 2 hours (it steams in those packets and the flavors meld nicely). Serve with salsa and if you're like me-- sour cream. :-)

    Makes 8 burritos.

    Wednesday, March 22, 2006

    Easter Story Cookies (Recipe)

    Cindy Downes (aka emptynestmom) posted this great idea on her blog.  Very cool idea for Easter with the kids-- just be sure to start it with your children the night before.  Thanks Cindy and Ellen!

    Friday, December 9, 2005

    The best chicken recipe ever

    I've been meaning to post this for some time.  It is THE best chicken recipe ever-- and don't be intimidated by the fact that it is a roast chicken...and a non-crockpot roasted chicken at that!  The seasonings sound weird, but I promise you that it is deeeeelicious!  Even my very picky dh and kiddos like it.  So here's one more thing you can do with a whole chicken when it goes on sale for .19 cents a pound!


    ROASTED CHICKEN


    2 tsp salt


    1 tsp white sugar


    1/8 tsp ground cloves


    1/8 tsp ground allspice


    1/8 tsp ground nutmeg


    1/8 tsp ground cinnamon


    5 garlic cloves, crushed


    1 (4#) whole chicken


    1. Mix all dry seasonings together.  Rub on chicken and sprinkle some in the cavity.  Stuff with garlic.  Cover with plastic and refrigerate for 24 hours.


    2. Place breast side down in a roasting pan.  (I just place it in a 9x13 corning dish)


    3. Roast for 15 minutes at 500.


    4. Roast for 15 minutes at 450.


    5. Baste if ya need to, although I never do.


    6. Roast for 45 minutes at 425.


    7. Remove from oven and let stand 20 minutes.

    I usually serve this with rolls, mashed potatoes, peas and corn.  Any leftovers (which are nonexistent at my house) are great chopped up and mixed with mayo and pepper for chicken salad sandwiches.  Every bite is full of flavor...not just the skin but the meat itself...and it has never ever come out dry for me.


    MMMMMMMMMMMMMM!!!!!!!!!!!

    Thursday, October 6, 2005

    Banana Pudding Recipe

    Okay, not much is completely made from scratch at my house...so this version of banana pudding is no exception...it's no-cook and as close to homemade as we're gonna get around here.  But it is the best that I've ever tasted and got rave reviews when 3 pans of it disappeared at my sis' baby shower (it's that good).


    INGREDIENTS:


    • 1 (8 ounce) package cream cheese
    • 1 (14 ounce) can sweetened condensed milk
    • 1 (5 ounce) package instant vanilla pudding mix
    • 3 cups cold milk
    • 1 teaspoon vanilla extract
    • 1 (8 ounce) container frozen whipped topping, thawed
    • 4 bananas, sliced
    • 1/2 (12 ounce) package vanilla wafers


    DIRECTIONS:


    1.  In a large bowl, beat cream cheese until fluffy.  Beat in condensed milk, pudding mix, cold milk and vanilla until smooth. Fold in 1/2 of the whipped topping.


    2.  Line the bottom of a 9x13 dish with vanilla wafers.  Arrange sliced bananas evenly over wafers.  Spread with pudding mixture. Top with remaining whipped topping.  Chill for 3 hours.


    Serves 12.


    Oh and our variation around this house is to (gasp!) omit the bananas...so I guess this is just really really delicious pudding.    What can I say?  Not only do bananas make me very itchy, but if you leave them in the pudding for too long they turn brown and icky...but we still CALL it banana pudding.

    Tuesday, October 4, 2005

    My delicious lunch of leftover BBQ Pulled Pork

    This was so good as leftovers today that I have to share my latest find.  I am a huge fan of the crockpot but have found that many of the recipes are awfully similar...in taste and ingredients.


    So I was a little apprehensive when I saw the McCormick Crockpot Seasoning packet for BBQ Pulled Pork.  You get a 3-4 lb pork roast and trim the fat.  Throw it in the crockpot with the seasoning mix, ketchup, apple cider vinegar and brown sugar (exact amounts on the seasoning packet).  I cooked it on low for 8 hours and served with tortillas or on buns (with garnish of jalapenos, sliced purple onion and pickles).  YUUUUUMMMY! 


    Not only was it easy for the first meal but I think it tasted even better reheated today for lunch.


    Now I need some homemade banana pudding to top off my meal...if I could just find a home that's made it already...